Restore Water-Damaged Photos: A Step-by-Step Guide
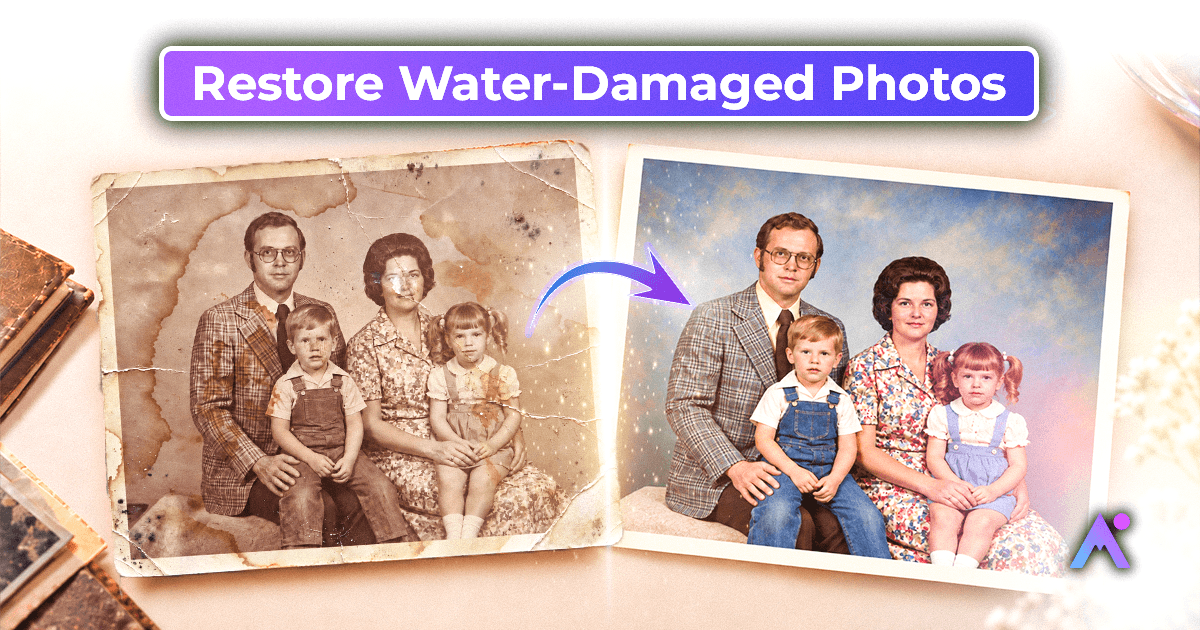
Old photographs hold memories that cannot be replaced. Birthdays, weddings, holidays and ordinary afternoons all live in those prints. A leaking pipe, a flooded basement or a spilled glass can put them at risk in minutes.
The good news: many water-damaged photos can still be saved. Quick first aid protects the original print, and careful scanning plus AI photo restoration can bring back much of what the water took.
This guide covers what to do in the first hours, how to restore water damaged photos digitally, how to handle creases and folds, and how to protect your collection from now on.
What Happens When Photos Get Water-Damaged?
Water affects photographs in several ways. The damage depends on the type of photo, how long it stayed wet, and whether the water carried dirt or other contaminants.
Common signs of water damage:
- Water stains: brown, yellow or uneven marks across the image.
- Faded colors: colors turn dull or shift after long exposure to moisture.
- Peeling surface: the image layer (the emulsion) softens, peels or lifts from the paper.
- Sticking: wet prints stick to each other, to glass, or to album pages and plastic sleeves.
- Mold: damp storage encourages mold, which stains and weakens photographs.
- Blurred detail: faces and backgrounds become hard to make out where the surface is damaged.
Not every water-damaged photo is beyond repair. The right approach depends on how much of the original image remains.
First Aid for Wet Photos: What to Do Right Away
Act quickly. In warm, humid conditions, mold can start to grow within about two days, so dry or freeze wet photos as soon as you safely can. If the water came from a flood, put your own safety first: turn off the power, wear gloves and a mask, and do not work alone.
1. Handle wet prints gently
Support each print from the back, or hold it by the edges. Never touch, rub or wipe the image side: the wet emulsion is soft and comes away easily. If a print is dirty and its surface is intact, you can rinse it briefly in a tray of clean, cool water.
2. Air-dry prints face up
Remove photos from frames, sleeves and albums where they come away easily. Lay each print face up on clean paper towels, blotting paper or a clean cloth. Keep air moving with a fan, pointed so it does not blow the prints around.
Never use a hair dryer, iron, heater or direct sunlight to speed things up. Heat can blister, crack or fuse the image permanently. Prints may curl as they dry; leave flattening to a conservator rather than pressing them.
3. Freeze what you cannot dry in time
If you have more wet photos than you can dry within a day or two, freezing pauses the damage. Interleave the prints with wax paper, seal small stacks in labeled plastic bags, and put them in the freezer. You can then thaw and air-dry them a few at a time, or take them to a conservator.
Freezing is a pause button, not a repair.
4. Never force stuck photos apart
Photos stuck to each other, to glass or to album pages can lose their image if you pull them apart. Bag them while still damp, freeze them, and ask a photograph conservator for help.
Important: do not freeze or freeze-dry tintypes, ambrotypes or glass plate negatives. Air-dry them face up straight away and contact a conservator; these older formats can be ruined within minutes of getting wet.
5. Scan only when the print is dry and stable
Do not put a wet, stuck or flaking print on a scanner, and never force it flat. Once a photo is fully dry and stable, make a digital copy. That copy becomes your working version, so the fragile original barely needs to be handled again.
This first aid guidance follows the Northeast Document Conservation Center's Emergency Salvage of Wet Photographs. For valuable or badly damaged collections, consult a qualified photograph conservator.

How to Restore Water-Damaged Photos Digitally
Digital restoration improves the image without touching the physical print. Once your photo is dry and stable, follow these five steps.
Step 1: Make a high-quality digital copy
Scan the photo at 600 DPI or higher, so faces, fabric and background details stay sharp. Clean the scanner glass first and line the print up straight. Our guide on how to scan old photos covers resolution and settings in more detail.
No scanner? Lay the photo flat in soft, even daylight and photograph it straight on with your phone, avoiding glare and shadows. Either way, save an untouched copy of the scan before you edit anything.
Step 2: Identify the damage
Look closely at the digital copy and note the main problems: water stains, fading, color shifts, spots, scratches, creases or loss of sharpness.
Knowing the damage helps you choose the right fix. Fading usually responds well to color correction, while missing facial detail needs more advanced restoration. Digital tools can recover a great deal, but they cannot bring back detail that is completely gone.
Step 3: Restore the photo with Animate Memories
Animate Memories uses AI to reduce stains, recover faded detail and sharpen faces in old photos. Here is how it works:
- Open the Studio and choose Restore.
- Upload your scan.
- Click Generate. The button shows how many credits the restoration uses before you start.
- Compare the restored image with your original, paying close attention to faces and to areas that were stained or creased.
- Download the result and keep it alongside your original scan.
Results depend on the condition of the original. AI restoration can greatly improve a stained or faded photo, but it cannot guarantee that every stain disappears or that missing areas come back exactly as they were.
Step 4: Fine-tune colors, brightness and contrast
Water often leaves photos yellowed, washed out or unevenly toned. If the restored image still needs work, make small adjustments to brightness, contrast and color balance in any photo editor.
Go gently: heavy filters make skin tones look unnatural and wipe out detail in shadows and highlights. For black and white photos, aim for balanced tones and clear contrast. For color photos, keep colors close to the original scene. If you want to add color to a black and white photo, see our guide to colorizing black and white photos.
Step 5: Check and save your files
Compare the finished photo with the original scan one last time. Do faces still look like the people you remember? Are important details intact?
Keep three files: the untouched scan, your edited version, and a full-resolution final copy for printing. Make a smaller copy for sharing online. If the photo matters for family history, keep the original scan with the restored one and note what was changed.

How to Repair Creased and Folded Photos
Water-damaged photos often crease, fold, curl or wrinkle as they dry. Creases can cut across faces and make important details hard to see.
Can you repair creases in old photos? Often, yes, in the digital copy. How well it works depends on how deep the crease is and whether image detail along the fold is missing.
To improve a creased photo digitally:
- Scan it carefully. Once the print is dry and stable, scan it at 600 DPI or higher. Do not press it flat to fit the scanner.
- Keep an untouched copy of the scan before editing.
- Check where the crease falls: across the background, clothing or someone's face.
- Restore it. Run the scan through Restore in Animate Memories, or use a retouching tool for fine lines.
- Compare the result with the original so faces still look natural.
Never iron, press or force a wet or fragile print flat. For a valuable print with deep creases, a photograph conservator can relax and flatten the original safely.
Can AI Completely Repair Water-Damaged Photos?
AI can fix a lot, but not everything. It works well on fading, low sharpness, noise, light stains and fine creases. Photos with large missing areas, severe emulsion loss or heavy mold damage may need a specialist restorer.
AI can also produce details that look convincing but are not historically accurate. Check restored faces carefully, especially when the photo is part of your family history.
The best results come from combining all three: careful care of the original print, good digital restoration, and professional help when the damage is severe.
How to Prevent Future Water Damage
Restoring a damaged photo is worthwhile, but preventing damage is better. A few habits protect your whole collection:
- Store prints somewhere dry: avoid basements, attics, and spots near pipes or with big temperature swings.
- Use archival materials: choose photo-safe sleeves, albums and boxes made for long-term storage.
- Keep photos off the floor: store them on shelves, away from kitchens, bathrooms and flood-prone rooms.
- Back everything up: scan important photos and keep copies in at least two places, such as a hard drive and a cloud service.
- Check regularly: look for moisture, discoloration, mold, or prints starting to stick together.
Digital copies are an extra layer of protection, not a replacement for storing the originals well.
Frequently Asked Questions
How long do I have to save wet photos?
Act as soon as possible. In warm, humid conditions, mold can start within about two days. If you cannot air-dry everything in time, freeze the prints to pause the damage, except tintypes, ambrotypes and glass plates.
Can I restore water-damaged photos at home?
Yes. Many photos can be improved at home with careful scanning and AI photo restoration. Wet, moldy, stuck or very fragile prints need gentle handling first, and severe damage may need a professional conservator.
Can AI remove water stains from old photos?
AI restoration can reduce many stains and recover detail around them. Results depend on the damage, and complete stain removal is not always possible.
Can I restore water-damaged photos online for free?
Some online tools offer free features or limited trials. Before uploading family photos, check each tool's image quality limits, privacy policy and download restrictions.
Should I scan a photo while it is still wet?
No. Never put a wet or unstable photo on a scanner. Let it dry fully first, and get professional advice if the print is stuck, flaking or fragile.
Can very old family photos be restored?
Often, yes, especially when faces and key details are still visible. The result depends on the photo's condition and how much of the image is missing.
Bring Your Family Photos Back
A water-damaged photo can feel like a piece of family history slipping away. With quick first aid, a careful scan and the right restoration, many of those memories can be saved.
Protect the original first. Then scan it, restore it, and keep both versions so the story and the history are preserved together.
Ready to give a damaged photo a fresh start?