How We Restored a 100-Year-Old Family Photo
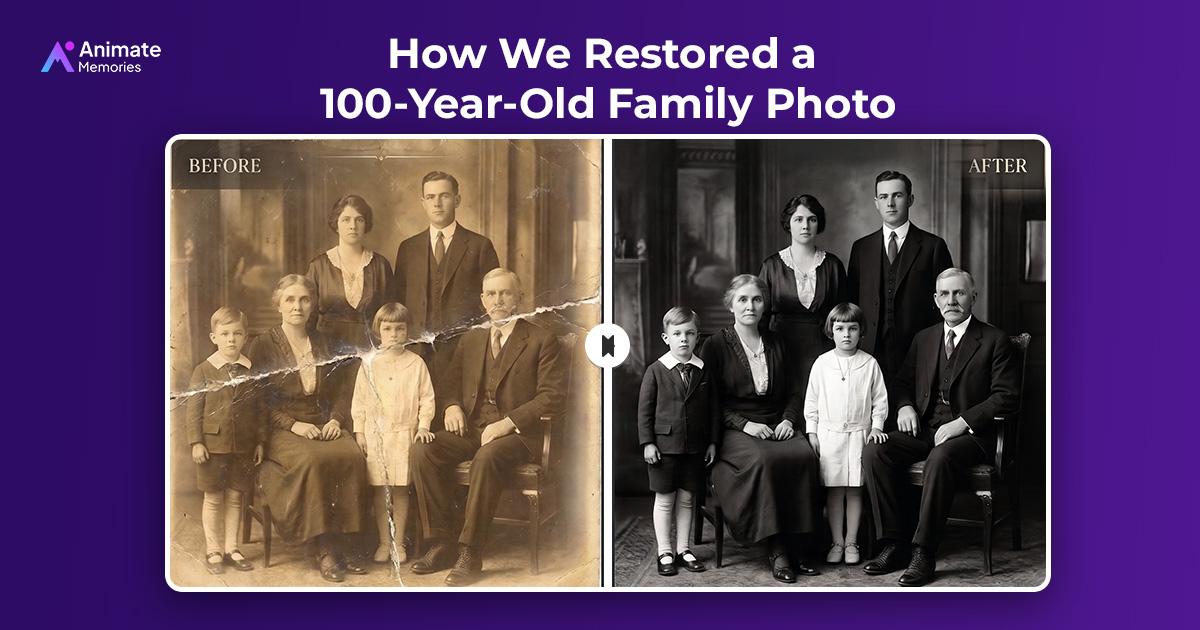
A photograph can hold more than a face. It can preserve a family connection, a forgotten story, and a moment that might otherwise disappear with time. But when a photograph is nearly a century old, years of handling, storage, moisture, dust, and fading can make it difficult to recognize the people in it.
That was the challenge behind one of our memorable restoration projects: a family portrait from 1924. The photograph had deep creases, scratches, stains, and fading. More importantly, it carried a story that a younger generation wanted to keep alive.
The woman's great-granddaughter shared a simple reason for wanting the photograph restored: she wanted her children to know what their ancestor looked like.
This project shows how restoring a 100-year-old family photo can help families reconnect with their history. It also offers practical lessons for anyone hoping to restore and preserve an old family photograph.
If you have an old photograph with similar damage, learn how to restore old photos online with AI and improve its appearance while preserving its original character.
The Story Behind a 100-Year-Old Family Photograph
The photograph arrived as a scan of an already scanned image. It showed a woman from 1924, but decades of wear had affected its appearance.
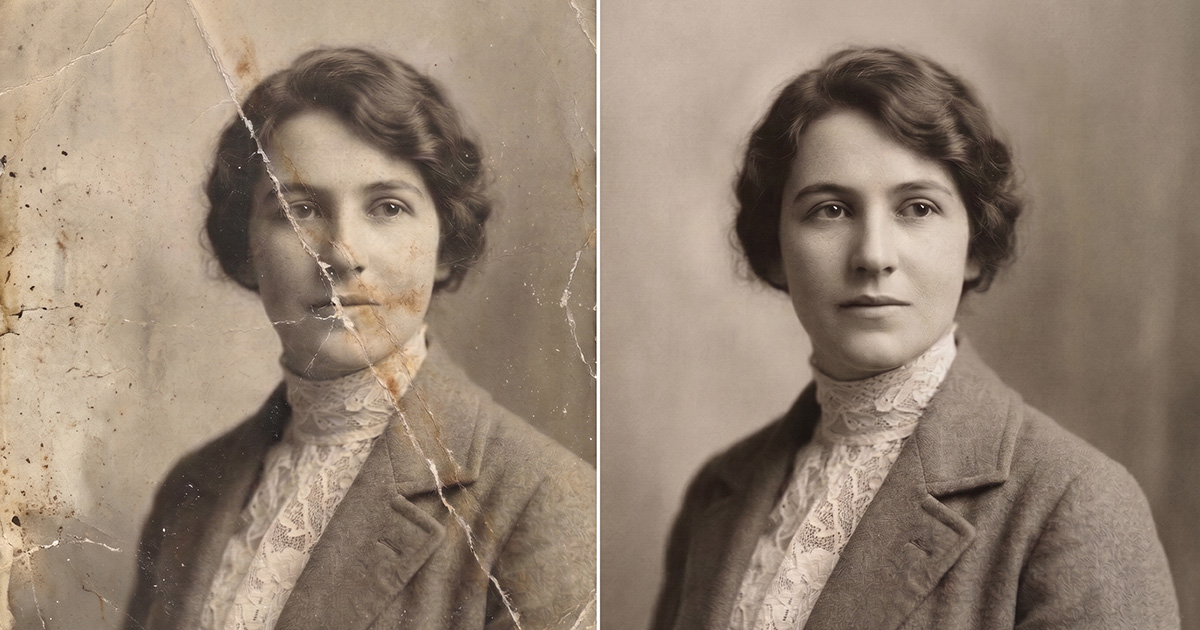
The portrait had been folded and stored for years. A prominent crease ran through the image, while dust, scratches, and stains made several areas difficult to see. Its original tones had faded, leaving the photograph with a soft, uneven appearance.
For the family, however, it was much more than a damaged print.
The woman in the photograph belonged to an earlier generation. Her great-grandchildren had never met her, but they wanted to understand their family history through the photographs and stories that remained.
Restoring the portrait was an opportunity to make that connection easier. The goal was not to create a different face or make the photograph look modern. It was to improve the image while respecting the original person's appearance and the character of the old photograph.
The Damage Report: What Had Happened to the Photo?
Before beginning any restoration, it helps to understand the condition of the original photograph. Different types of damage affect images in different ways, and identifying them makes it easier to decide what needs attention.
Here were the main problems with this 100-year-old family photo.
1. Deep Creases Across the Photograph
The photograph had been folded for a long time. A visible crease ran through the portrait, interrupting the image and affecting important details.
Creases can be particularly difficult to repair when they cross a person's face or clothing. Restoration needs to rebuild the missing visual information without changing the person's recognizable features. Our guide to restoring creased and water-damaged photos covers this in more detail.
2. Scratches, Dust, and Surface Marks
Small scratches and dust particles had accumulated across the photograph. Some marks were easy to notice, while others blended into the faded background.
These imperfections can distract from the original subject and make an old photograph appear more damaged than it really is.
3. Fading and Uneven Tones
The photograph had lost much of its original contrast. Darker areas appeared weak, while lighter parts lacked definition.
Fading is common in old photographs, especially when they have been stored in unsuitable conditions or exposed to light over many years.
4. Low-Quality Digital Scan
The image was not a direct, high-quality scan of the original print. It had already been scanned once, which meant some detail was missing before restoration even began.
This is an important consideration: restoration can improve the available image, but it cannot always recover details that were never captured in the digital copy.
Our Photo Restoration Process
Restoring an old photograph involves more than removing visible marks. The aim is to improve clarity while keeping the original image recognizable.
For this portrait, the restoration process focused on cleaning visible damage, improving facial details, and bringing back a more balanced appearance.
Step 1: Cleaning Scratches, Dust, and Creases
The first stage focused on reducing visible damage. Scratches, dust marks, and crease lines were addressed so that they would no longer distract from the portrait.
In Animate Memories, the Restore option handles this stage: it finds scratches, dust and crease lines and rebuilds those areas. The result still depends on the quality of the source photograph and how much information remains visible.
It is important to review the restored image carefully, especially around faces, hands, clothing, and other distinctive details.
Step 2: Improving Facial Details
The woman's face was the most meaningful part of the photograph. Improving its visibility was therefore an important part of the process.
AI-based face enhancement can help make soft or unclear facial areas appear sharper. It may improve the appearance of details around the eyes, hair, and skin.
However, enhancement tools sometimes generate details that are not clearly present in the original. For family photographs, a natural result is more important than an overly sharp or heavily edited face.
Always compare the enhanced version with the original to check that the person's identity and recognizable features remain consistent.
Step 3: Restoring the Photograph's Tonal Balance
The original portrait had a faded appearance. The next stage focused on improving its contrast and tonal balance.
For black-and-white photographs, this does not necessarily mean adding color. A carefully restored monochrome image can preserve the original historical character of the photograph.
If colorization is chosen, remember that AI-generated colors are interpretations rather than verified historical details.
Clothing, skin tones, and backgrounds may look realistic, but they should not automatically be treated as historically accurate. Our guide to colorizing black-and-white photos explains how to do it carefully.
Step 4: Reviewing the Final Image
Once the restoration stages were complete, the result needed to be reviewed against the original.
We looked at whether the major marks had been reduced, whether the face remained recognizable, and whether the photograph still felt like the same portrait from 1924.
This final review matters because restoration should not erase the character of an old photograph. Small signs of age can be part of its history, and removing every trace of them is not always necessary.
The Result: A Family Connection Becomes Easier to See
When the family saw the restored portrait, the response was emotional. The photograph had become clearer, making it easier for younger family members to see the woman whose story had been passed down through generations.
The restoration did not change the history behind the photograph. It simply made the image easier to view, share, and preserve.
For the great-granddaughter, the most meaningful part was being able to show her children a clearer picture of an ancestor they had never met.
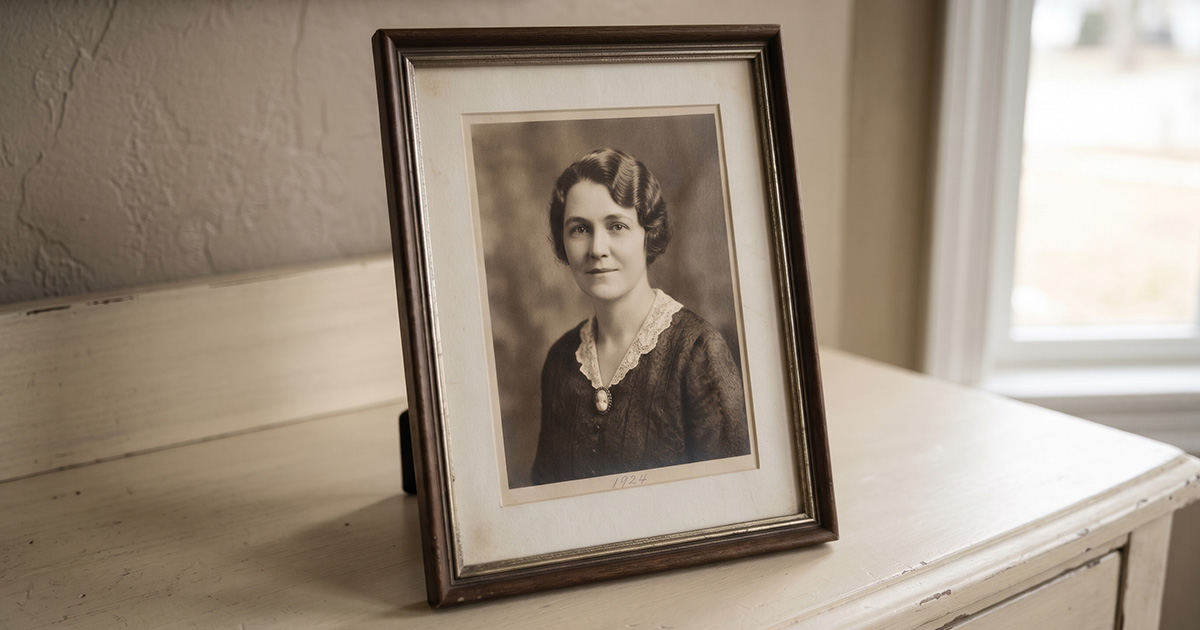
That is one reason old photo restoration matters. It gives families another way to connect names, stories, and memories with the faces of people who came before them.
How to Prepare Your Own 100-Year-Old Family Photo for Restoration
If you have a photograph that is decades or even a century old, a little preparation can help you get a better digital result.
1. Handle the Original Photograph Carefully
Avoid unnecessary handling, rubbing, or trying to flatten a photograph by force. Old prints can be fragile, especially around folds and torn edges.
If the photograph is stuck to glass, badly torn, or deteriorating, consider getting advice from a professional photo conservator before attempting physical repairs. If the print is torn, see how to restore torn photos.
2. Scan at a High Resolution
Whenever possible, scan the photograph at 600 DPI or higher. A higher-resolution scan can capture more of the details available in the original print.
Use a clean scanner surface and place the photograph carefully. Avoid pressing down hard on fragile prints.
3. Scan in Color
Even when the original photograph is black and white, a color scan can capture subtle tonal information, stains, and paper discoloration.
Save a high-quality copy of the scan before making edits. This gives you an untouched digital version to return to if needed.
4. Avoid Editing the Original Scan First
Do not remove scratches, crop important areas, or apply filters before starting the restoration process.
Keeping the original scan intact gives the restoration tool more information to work with. You can always create edited copies later.
5. Compare the Restored Version with the Original
After restoration, check the face, hair, clothing, background, and other recognizable details.
If the result changes facial features or creates details that do not match the original, try a lighter restoration approach. The purpose is to improve the photograph, not redesign it.
How to Preserve Restored Family Photographs for Future Generations
Restoring a photograph is only one part of preserving family history. Once you have a clearer digital version, make sure it remains accessible and protected.
- Keep multiple digital copies: Save the restored image in more than one secure location, such as an external drive and a trusted cloud storage service.
- Preserve the original scan: Keep an untouched copy alongside the restored version.
- Add names and dates: If you know who appears in the photograph, record their names, approximate date, and any family story connected to the image.
- Share it with relatives: Send copies to family members who may have additional information about the people or events in the photograph.
- Store the physical print safely: Keep the original in a suitable archival-quality sleeve or album, away from direct sunlight, moisture, and excessive heat.
These small steps can help ensure that the photograph remains part of your family's collection for years to come.
Once your photographs are restored, you can also explore how to animate an old photo to discover another creative way to revisit family memories.
Every Old Family Photo Has a Story Worth Preserving
A 100-year-old photograph may have scratches, fading, folds, or missing details, but its value is not measured by its condition. It may be the only surviving image of a great-grandparent, an important family occasion, or a person whose story has been shared across generations.
Restoring a 100-year-old family photo can make that connection easier to see. With careful scanning, thoughtful restoration, and proper preservation, families can give old photographs a place in their present-day lives without forgetting their history.
At Animate Memories, we believe every photograph carries a story. The technology is useful, but the people and memories behind the image are what make the restoration meaningful.
You can also turn old photos into videos with AI, or read how a 1920s wedding photo brought four generations to tears.
Have an old family photo that needs care? Restore your photo now.