How to Restore Torn Photos: A Step-by-Step Guide
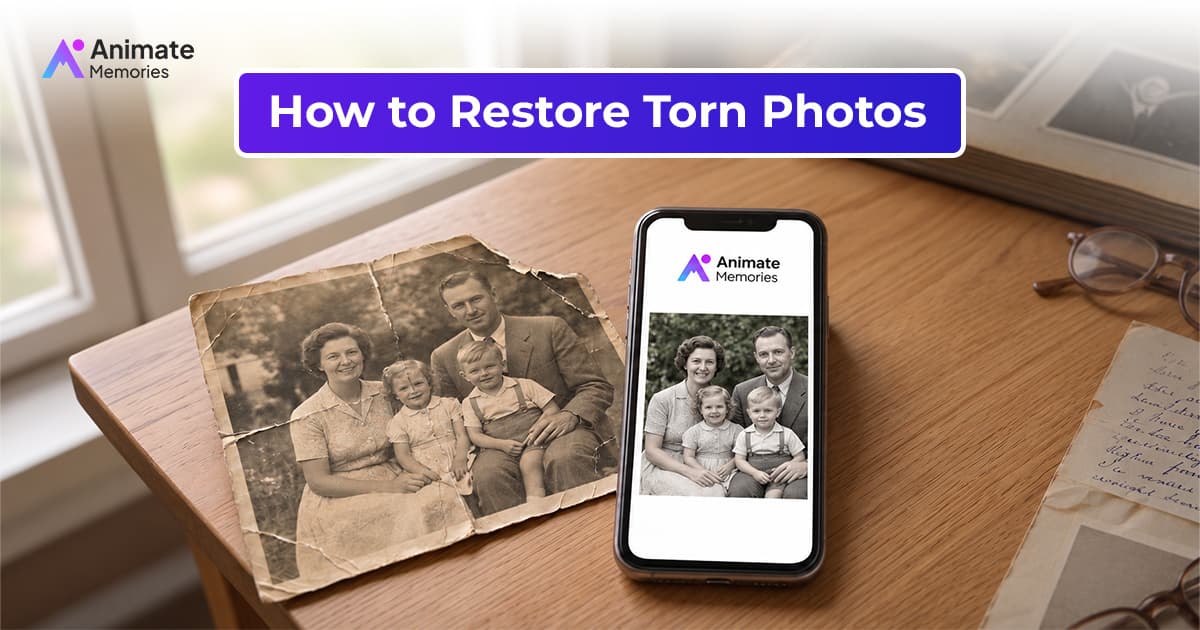
Old photographs preserve moments that cannot be recreated. A childhood portrait, a wedding picture, or a family photograph passed down through generations may hold years of memories. Unfortunately, photographs can tear, split at the edges, develop creases, or lose small pieces through handling and aging.
The good news is that many torn photographs can be improved. Careful handling helps protect the original print, while digital restoration offers a way to repair visible tears and improve damaged areas without physically altering the photograph.
Learning how to restore torn photographs can help you preserve important family memories and create digital copies that are easier to share, print, and store.
This guide explains how to handle torn prints safely, scan them for digital repair, use AI photo restoration, and protect your photographs from further damage.
What Causes Photographs to Tear?
Photographic prints can become fragile over time. Repeated handling, poor storage, moisture, folding, and accidental pulling can cause paper to split or break.
Common types of photograph damage include:
- Straight tears: A photograph splits into two or more pieces, sometimes through a face or important subject.
- Torn edges: The outer edges become ragged or pieces of the print are missing.
- Creases and folds: Pressure creates visible lines that may break the image surface. See our guide to restoring creased and water-damaged photos.
- Surface scratches: The photograph develops marks that interrupt details.
- Missing sections: Small or large pieces of the image are lost.
- Fading and discoloration: Aging and environmental exposure make details harder to see.
The best restoration method depends on the condition of the photograph. A clean tear with both pieces intact is different from a photograph with missing sections or severe surface damage.
What to Do Before Restoring a Torn Photograph
Before attempting any repair, protect the physical photograph. Old prints may be more fragile than they appear, and an incorrect repair can cause additional damage.
1. Handle the Photograph Gently
Hold the print by its edges and support it from underneath. Avoid repeatedly bending it or pulling at loose sections.
If the photograph has separated into pieces, keep the pieces together in a safe container and preserve their original orientation.
2. Do Not Use Household Glue or Tape
Avoid ordinary adhesive tape, glue sticks, and other household adhesives on the photograph. These materials can discolor the print, leave residue, or make future professional restoration more difficult.
If a photograph has significant historical or sentimental value, consult a qualified photograph conservator before attempting physical repairs.
3. Keep the Photograph Dry and Protected
Store the print in a clean, dry location away from direct sunlight, excessive heat, and moisture. Use photograph-safe storage materials where possible.
Do not wash a photograph or apply cleaning products to remove marks. Digital restoration is usually the safer starting point when the goal is to improve the image.
4. Gather All Available Pieces
If parts of the photograph have torn away, collect and protect any pieces you can find. Even a small fragment may contain useful visual information.
Keep every piece separate from unrelated photographs and avoid trimming uneven edges.
How to Restore Torn Photographs Digitally
Digital restoration allows you to work on a scanned copy while keeping the original print untouched. Follow these steps to prepare and repair a damaged photograph.
Step 1: Scan the Photograph Carefully
Create a high-resolution digital copy of the photograph. A scan at 600 DPI is a useful starting point for detailed restoration, particularly for smaller prints.
Before scanning:
- Clean the scanner glass.
- Position the photograph carefully.
- Avoid forcing curled or fragile prints flat.
- Save the scan in a high-quality image format.
- Keep an untouched copy of the original scan.
If you do not have a scanner, photograph the print straight on in soft, even lighting. Avoid glare, shadows, and reflections that may hide important details. Our guide to scanning fragile tintypes and glass negatives has more scanning tips.
Step 2: Identify the Torn Areas
Examine the digital copy and identify where the damage appears.
Look for separated edges, white gaps, missing corners, broken facial details, and lines running through clothing or backgrounds.
Determine whether the photograph is torn but complete, or whether some of the original image is missing. This distinction matters because joining visible pieces is different from reconstructing information that no longer exists.
Step 3: Restore the Photograph with Animate Memories
Animate Memories provides an AI photo restoration workflow that can help improve damaged photographs. Depending on the image, restoration may reduce visible imperfections, improve sharpness, and make faded details easier to see.
To get started:
- Open the Animate Memories Studio and choose Restore.
- Upload your digital photograph.
- Generate the restored photo. The credit cost shows before you start.
- Compare the restored image with the original scan.
- Review the damaged areas, especially faces and places where the tear crosses important details.
- Save the result alongside the untouched original.
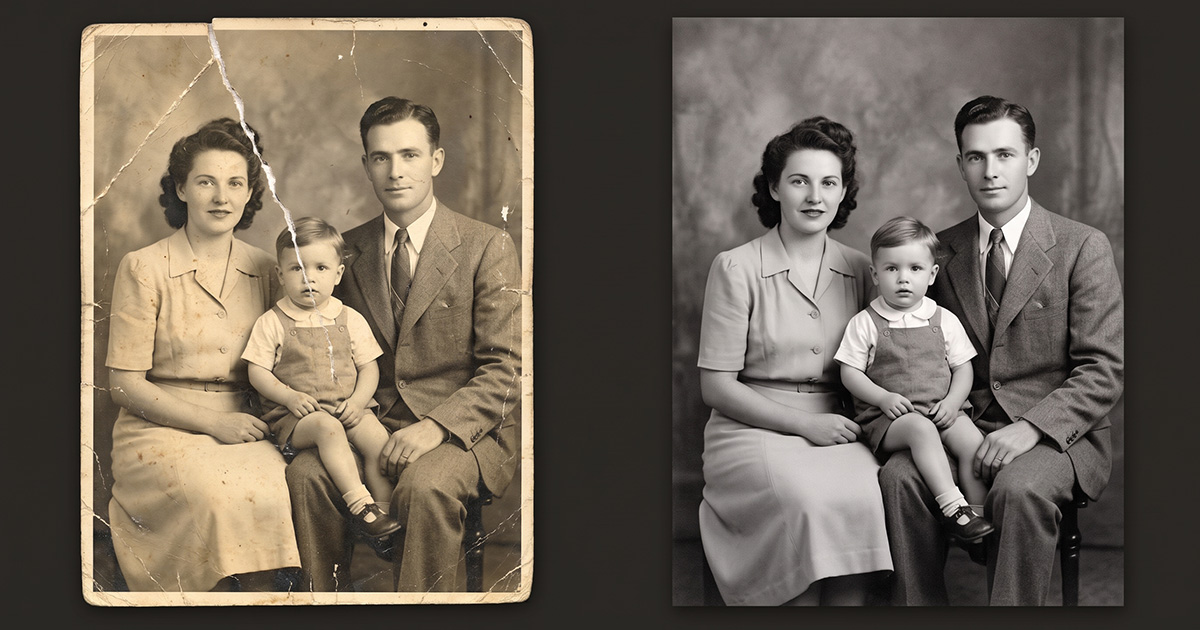
AI restoration may improve the appearance of torn photographs, but it cannot guarantee an exact reconstruction of missing image content. Review any generated facial features and details carefully.
Step 4: Check the Repaired Edges and Missing Details
After restoration, zoom in on the areas that were damaged.
Check whether the edges appear consistent, whether lines and patterns look natural, and whether faces retain their original appearance.
AI may generate plausible details in missing areas. These details can look convincing without being historically accurate.
If preserving historical accuracy is important, retain the original scan and clearly distinguish reconstructed areas from original image information.
Step 5: Adjust Color, Brightness, and Contrast
Torn photographs may also be faded, yellowed, or unevenly exposed.
If necessary, make gentle adjustments to brightness, contrast, and color balance using a photo editor. Avoid aggressive filters that can change skin tones or remove fine details.
For black-and-white photographs, focus on balanced tones and clear detail. For color photographs, aim to preserve a natural appearance rather than introducing colors that were not present in the original.
Step 6: Save and Back Up the Restored Photograph
Keep at least three versions of the image:
- The untouched original scan.
- The restored working copy.
- The final high-resolution version.
You can also create a smaller copy for online sharing. Store backup copies in separate locations, such as an external drive and a trusted cloud service.
This approach lets you revisit the restoration later without losing the original digital record.
How to Repair Different Types of Torn Photographs
Not every torn photograph needs the same approach. The location and extent of the damage affect what can realistically be restored.
Repairing a Photograph Torn in Half
When a photograph has split into two pieces, preserve both pieces and avoid forcing their edges together physically.
Scan each piece carefully if they cannot safely be placed together. A digital editing workflow may help align the sections and reduce the visible separation.
If the tear passes through a face, inspect the restored result closely. Reconstructed facial details may differ from the person's actual appearance.
Fixing Torn Edges and Corners
Small tears around the edges may be easier to address than damage through the main subject.
Digital restoration can sometimes reduce the visibility of damaged borders or help reconstruct the appearance of a missing corner. However, if the print itself is physically fragile, avoid trimming or reshaping it just to make the edges look neat.
Restoring Photographs with Missing Pieces
Missing sections present a greater challenge because the original image information is no longer available.
AI tools may generate replacement details based on the surrounding image. This can improve the overall appearance, but it is an interpretation rather than a guaranteed recovery of the original scene.
Whenever possible, use other photographs from the same event or collection as references. They may help you understand the original clothing, background, or setting.
Repairing Tears Across Faces
Tears that cross the eyes, nose, mouth, or other facial features require extra care.
Review the repaired face against the original photograph and other reliable family pictures, if available. Avoid assuming that every AI-generated detail is accurate.
For valuable portraits or severe facial damage, a professional photo restorer may offer more control over the reconstruction.
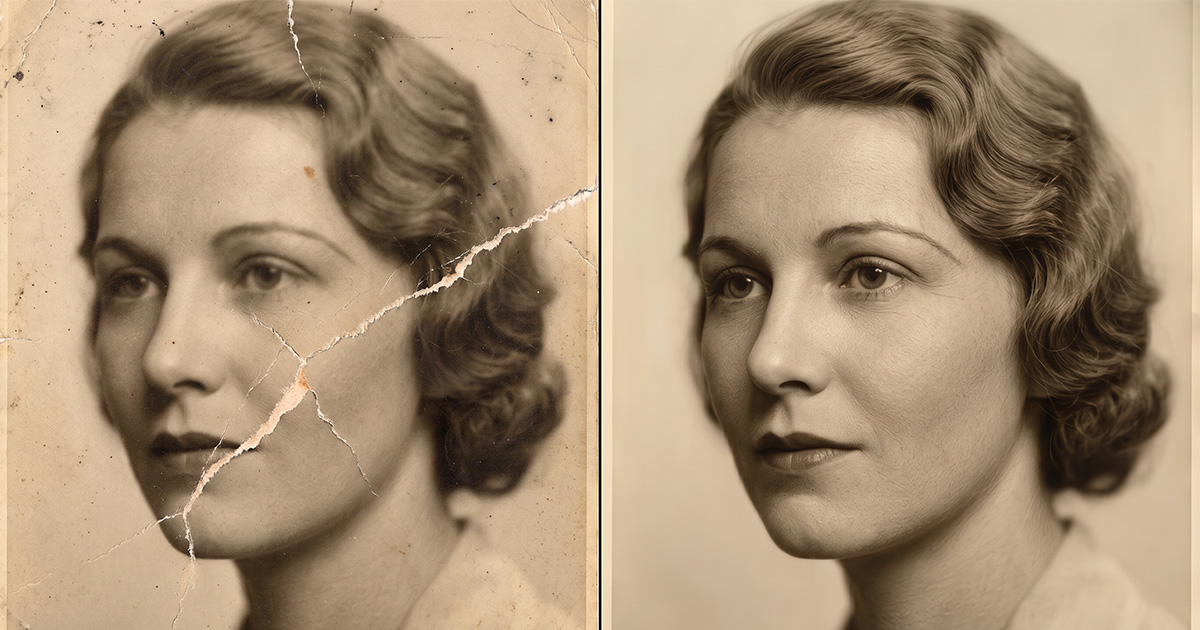
Can AI Restore Torn Photographs Completely?
AI photo restoration can improve many damaged photographs, but complete restoration is not always possible.
Results depend on several factors:
- How much of the original image remains.
- Whether the tear crosses a face or an important object.
- The resolution and clarity of the digital scan.
- The extent of fading, scratches, and surface damage.
- Whether any original pieces are missing.
When the photograph is torn but most of the image remains, digital repair may produce a useful result. When large sections are missing, the restored image may contain AI-generated details that cannot be verified against the original.
For particularly valuable photographs, consider consulting a professional restorer before making extensive edits.
How to Prevent Further Damage to Old Photographs
Once you have restored a digital copy, take steps to protect the original print.
- Use archival storage: Choose photograph-safe sleeves, albums, and boxes.
- Avoid direct sunlight: Prolonged exposure can fade photographs.
- Control moisture: Store prints in a dry environment away from damp walls and leak-prone areas.
- Minimize handling: Handle fragile photographs only when necessary.
- Keep digital backups: Store original scans and restored versions in more than one location.
- Label photographs carefully: Record names, dates, and events when known, without writing directly on fragile image surfaces.
Digital copies provide another layer of protection, but they do not replace appropriate storage and care for the original photographs.
Frequently Asked Questions
Can I restore a torn photograph at home?
Yes. Scan the photo or take a clear phone picture of it, then upload it to Animate Memories and choose Restore. For fragile physical prints, avoid household adhesives and ask a photograph conservator when the print is valuable.
How do I fix a photograph torn in half?
Keep both pieces safe, avoid forcing them together, and create digital copies where possible. A digital editing or restoration workflow may help align the pieces and reduce the appearance of the tear.
Can AI repair missing parts of old photographs?
AI may generate details in missing areas based on the surrounding image. These details can improve the visual appearance, but they may not accurately reproduce the original scene.
Can I restore torn photographs online?
Yes. Upload a scan to Animate Memories, choose Restore, and download the result. Read our privacy policy before uploading personal family photos. For more on the process, see our guide to restoring old photos online with AI.
Should I use tape to repair a torn photograph?
Ordinary household tape is not recommended because adhesives may leave residue, discolor the photograph, or complicate future restoration. For valuable prints, consult a qualified photograph conservator.
Can severely damaged family photographs be restored?
Some severely damaged photographs can be improved, but results depend on how much image information survives. Large missing sections and extensive damage may require specialist restoration, and exact recovery may not be possible.
Should I keep the original after restoring a photograph?
Yes. Keep the physical original whenever possible, along with an untouched digital scan and the restored version. This preserves a record of the original image and makes future restoration possible.
Preserve Your Family Memories
A torn photograph does not necessarily mean the memory it holds is lost. With careful handling, a high-quality digital scan, and an appropriate restoration process, many damaged pictures can be improved and preserved for future generations.
Start by protecting the original print, then work on a digital copy. Compare the restored result carefully and keep both versions so you can preserve the photograph's history while making its details easier to appreciate. Once it is restored, you can also bring it to life with our guide to animating an old photo.
Ready to give a damaged family photograph a fresh start?